
A garden fence keeps your plants safe. It also makes your yard look nice. Building a fence may seem hard, but it is not. You can finish it in a weekend if you follow the right steps.
A nail gun makes the work easy. It helps you attach fence panels fast. It is better than using a hammer and nails. You will save time and effort.
You can use hammers instead of nailers. But for this type of project that you want to finish within a weekend then nailer guns are the best option for nailing. Nail guns are more accurate than traditional hammers.
Why a Nail Gun is the Best Choice for a Weekend Fence Project
Faster Installation Compared to Manual Nailing
A nail gun drives nails into the wood very quickly. You do not need to hammer each nail by hand.
This saves a lot of time. You can finish your fence much faster.
You might even cut your installation time by half. This helps you complete the project in a weekend.
Consistent Nail Depth for Stronger Joints
A nail gun always drives nails to the same depth. Every nail goes in the exact same way.
This makes the joints stronger. It helps prevent weak spots in the fence.
Your fence will stay tighter and less likely to have loose or wobbly panels.
Reduced Physical Strain and Fatigue
Hammering nails by hand is tiring. It takes a lot of energy. After hammering for a while, your arms and hands can get sore. A nail gun makes this process easier.
It reduces the effort you need to put in. This means you can work longer and finish faster without getting as tired.
Increased Accuracy and Professional Finish
A nail gun has guides that help keep the nails straight. The nails are driven in at the right depth every time. This helps avoid crooked nails.
The nails will go in flush with the wood. Your fence will look clean and neat. It will have a more professional finish.
Works Well with Different Fence Materials
You can use a nail gun with many types of fence materials. It works well with wood, composite, and pre-built panels.
The nail gun makes sure the nails go in securely. It helps you create a strong fence, no matter what material you choose.
Less Risk of Wood Splitting
When you use a hammer, it’s easy to split the wood. If you hit the wrong spot or hit too hard, the wood might crack. This weakens the fence.
A nail gun reduces this risk. The nails go in with controlled force, which helps protect the wood and keeps it intact.
How to Plan Your Garden Fence in One Evening (Friday Night Prep)
Measure and Mark Your Fence Line
Use stakes and string to mark where your fence will go. This will help you see the layout and make sure the lines are straight.
Double-check your property boundaries to avoid any problems with your neighbors later.
Check Local Building Codes and Permits
Look into your local zoning laws and HOA rules. These laws will tell you how tall your fence can be and what materials you can use.
If you need a permit, get it before you start to avoid any delays.
Choose the Right Fence Style and Material
Decide what type of fence you want. You can choose from a picket fence, privacy fence, or post-and-rail fence.
Think about what you need, like security, privacy, or to keep pets in.
Choose materials like wood, vinyl, or metal based on how long they will last and how much work they need to maintain.
Make a List of Tools and Materials
Make sure you have the right tools ready. You’ll need a nail gun, air compressor (if using one), level, post-hole digger, and a circular saw.
You’ll also need enough fence posts, nails, concrete, and sealant. This way, you won’t have to run to the store in the middle of your project.
Check the Weather Forecast for the Weekend
Check the weather for rain, wind, or heat. Bad weather can slow you down.
If bad weather is coming, change your schedule or make a plan to protect your materials.
Set Up a Work Area for Efficiency
Clear the area where you’ll be working. Put tools and materials in easy-to-reach spots.
Set up a station for cutting and assembling the fence. This will make your work go faster and smoother.
Essential Tools and Materials to Gather Before the Weekend Begins
Nail Gun (Pneumatic or Cordless)
A nail gun is the most important tool for building your fence quickly and securely. A pneumatic nail gun uses air power to drive nails.
It is great for high power and accuracy. A cordless nail gun runs on batteries. It offers more mobility since you don’t need an air hose.
Air Compressor (If Using a Pneumatic Nail Gun)
If you are using a pneumatic nail gun, you will need an air compressor. Make sure the compressor has enough PSI to drive nails effectively.
You also need the right hose and fittings to connect the gun to the air compressor. This will make the nail gun work smoothly.
Galvanized or Stainless Steel Nails
Use galvanized or stainless steel nails to prevent rust. These nails can handle weather changes and moisture.
Choose nails that are 2 to 3.5 inches long, depending on your fence. These nails work well for securing fence pickets and rails.
Measuring and Marking Tools
You will need a measuring tape that is at least 25 feet long. This will help you space your fence posts correctly.
Use a chalk line to keep your fence line straight. Marking stakes and string will help you outline your fence layout before you dig post holes.
Post Hole Digger or Auger
A manual post-hole digger works well for small projects. However, a gas-powered auger speeds up digging.
If you are digging many holes or deep ones, the auger is a great tool.
The hole should be at least one-third the height of your fence post.
Fence Panels or Pickets
You can choose pre-assembled fence panels to save time. These panels are already built and ready to install.
If you want more customization, use individual pickets. You can pick materials like cedar, pressure-treated wood, vinyl, or composite, depending on how long you want the fence to last.
Fence Posts (Wood or Metal) and Concrete Mix
You need strong fence posts to hold your fence up. Use wood posts like 4×4 or metal posts for better support.
Secure them with quick-set concrete for strength and stability. Typically, you will need 1 bag of concrete (50-60 lbs) per post.
Circular Saw or Handsaw
A circular saw helps you cut fence panels and posts quickly. If you need to make smaller cuts, a handsaw works well.
Be sure your saw has a sharp wood-cutting blade. This will make your cuts clean and fast.
Level and Speed Square
A level is essential to make sure your posts and panels are straight. Use a 2-foot or 4-foot level for best results.
A speed square helps you make precise cuts. It also helps you make 90-degree angles for your fence parts.
Safety Gear (Gloves, Goggles, and Ear Protection)
Always protect yourself when using tools. Wear work gloves to protect your hands. Use safety goggles to protect your eyes.
Ear protection is important when using loud tools like nail guns or saws. Safety comes first to keep you safe while working.
Saturday Morning: Measuring and Marking Your Fence Line Efficiently
Understand the Fence Area Before You Start
Look at the whole area where the fence will go. Walk along the edges. Make sure you know exactly where the fence should be.
Check for anything that might get in the way, like big rocks or trees. If something is in the way, decide how to adjust your fence to fit.
Mark the Fence Line with Stakes and String
Take wooden stakes and put them in the ground at each corner of the fence. Also, put stakes along the edges where the fence will be.
Tie a string from one stake to the next. This string will help you see where the fence should go. Keep the string tight so the fence line stays straight.
Measure and Mark Where the Posts Will Go
Use a measuring tape to find out where each fence post should go. Most fences have posts that are 6 to 8 feet apart.
Mark each post location on the ground. If your fence needs a different post spacing, adjust the distance. Keeping posts the same distance apart makes the fence strong and even.
Mark the Ground with a Chalk Line
Once you have your stakes and string in place, take a chalk line and snap it along the ground.
This will leave a clear line where the fence should go. The chalk line helps you dig post holes in the right spots and keeps everything straight.
Check That the Fence Line is Straight
Walk along the fence line again. Look closely at the string. Make sure it is in a straight line from one end to the other.
Use a level to check if the string is even. If something looks crooked, adjust the stakes or string. Fixing small mistakes now will save a lot of time later.
Plan for Gates and Other Features
Decide where the fence will have gates or special sections. Mark those spots clearly. If you are adding a gate, make sure the space is wide enough for easy entry.
Also, if the ground is uneven, think about how to adjust the fence to fit.
Saturday Afternoon: Digging and Installing Fence Posts Quickly
Gather Your Tools and Get the Area Ready
First, take all the tools you need. You will need a post-hole digger, a shovel, and a gas-powered auger if you have one. Bring them to the work area.
Make sure each place where you will dig is clear. Remove anything in the way.
Keep your tools close so you do not waste time looking for them. This will help you work faster.
Dig the Post Holes to the Right Depth and Width
Each hole needs to be deep enough to keep the post strong. A good rule is to make the hole one-third the length of the post.
For example, if your post is six feet tall, the hole should be two feet deep. The hole should also be wide enough.
A good width is about three times the size of the post. This gives space for the concrete to hold the post in place.
Make Sure the Post is Straight with a Level
After you put the post in the hole, check if it is straight. Use a level to make sure the post stands up perfectly straight.
If the post leans, fix it before adding concrete. If the post is not straight, the whole fence will look uneven. Take your time and get this part right.
Pour Concrete to Hold the Post in Place
Once the post is straight, pour quick-setting concrete into the hole. Fill the hole halfway first.
Stop and check if the post is still straight. If the post moved, adjust it now.
Then, fill the rest of the hole with concrete. Use a trowel to push the concrete around the post. This will make it more solid.
Let the Concrete Start to Set for 10 to 15 Minutes
Do not touch the post for about 10 to 15 minutes after pouring the concrete. The concrete will start to harden during this time.
If you move the post too soon, it might shift. While waiting, you can start digging the next hole or clean up the work area.
Install One Post at a Time
Work on one post at a time. Do not rush to do too many at once. Make sure each post is straight before moving to the next one.
Keep using the level to check. If one post is out of line, it will make the whole fence look wrong.
Keep the Distance Between Posts the Same
Check the spacing between each post. All posts should be the same distance apart.
Use a measuring tape to check each time. If the spacing is off, the fence will look uneven and might be weak.
Saturday Evening: Letting Concrete Set Overnight for Maximum Stability
Check Each Post One Last Time
Before the concrete becomes completely hard, check each post again. Use a level to make sure every post is straight.
If a post is leaning, move it slightly now. After the concrete hardens, you cannot fix it. This step is very important for a strong and even fence.
Protect the Concrete from the Weather
If the weather is very hot or windy, the concrete could dry too fast. Cover it with a plastic sheet or tarp to keep the moisture in.
If it is cold, you may need to add insulation to help the concrete set properly. Bad weather can weaken the concrete if you do not take the right steps.
Make Sure Water Does Not Pool Around the Posts
Check the ground around the posts. Water should not gather near the base. If rain or hose water sits on the concrete, it can make the fence weaker.
If you see low spots where water might collect, add some dirt to raise the ground a little.
Leave the Concrete Alone for the Night
The concrete will start to harden in 4 to 6 hours, but it is better to leave it alone all night.
This gives the concrete more time to become strong. The longer it sits, the better it will hold the posts in place.
Sunday Morning: Attaching Fence Panels or Pickets with a Nail Gun
Check That the Posts Are Strong
Look at each fence post. Push the posts slightly to see if they move. The concrete must be hard before you attach anything. If a post moves, fix it before you start. A loose post will make the fence weak.
Measure and Mark Where to Attach Panels or Pickets
Take a measuring tape. Mark the exact spot where each panel or picket will go. Use a chalk line to keep the marks straight.
Check that the height is the same on all posts. A fence with uneven panels will not look good.
Attach the First Panel or Picket Carefully
Pick a starting point at the edge of the fence. If using panels, place the first one against the posts.
If using pickets, start at the corner or near a gate. Hold the panel or picket in place. Make sure it is level before nailing.
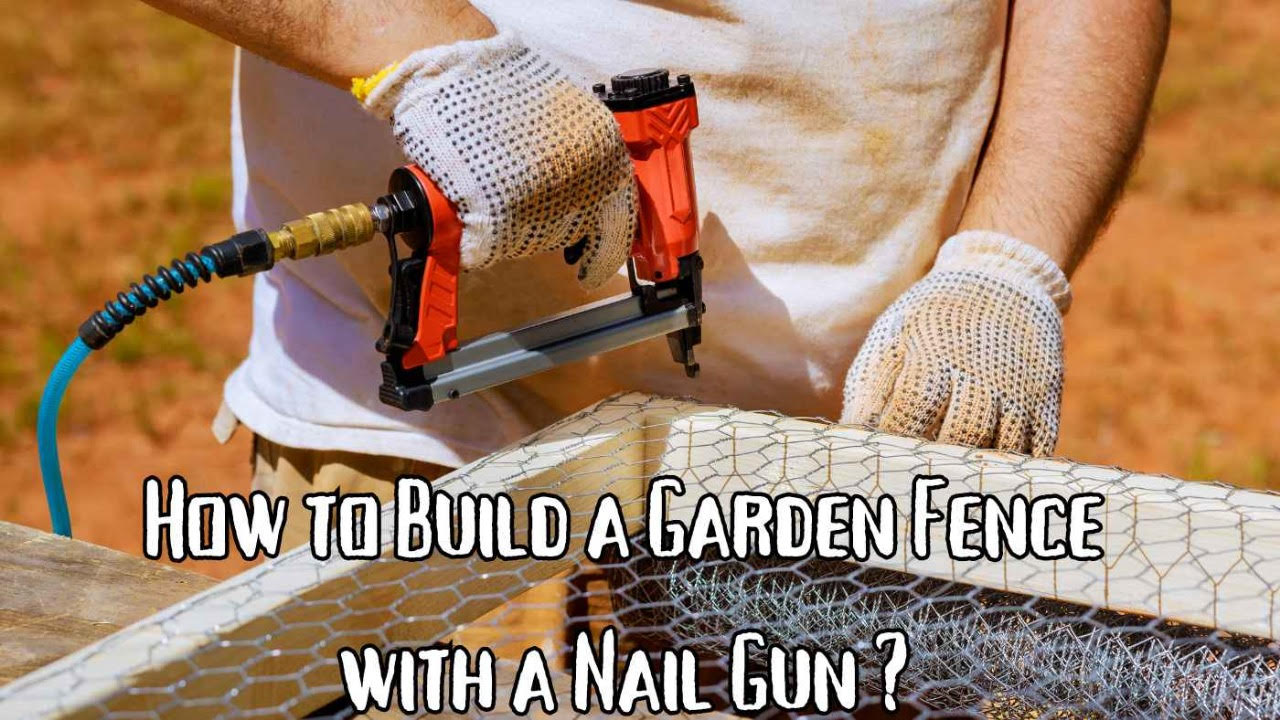
Use the Nail Gun to Fix the Panels or Pickets
Put the nail gun in the right spot. Press the trigger to shoot the nail into the wood.
Make sure the nails go deep enough to hold the panel or picket. Use nails that will not rust. Space the nails evenly for a strong hold.
Check That the Fence Is Straight
After attaching each panel or a few pickets, stop and look. Step back to see if everything is straight.
Use a level to check. If something is not straight, fix it before moving to the next part.
Keep the Gaps Between Pickets the Same (If Using Pickets)
If you are using pickets, leave a small gap between them. This will help air move through and let the wood expand.
Use a small block of wood to keep the gaps the same size. A fence with even gaps looks better.
Fix the Top and Bottom Rails Firmly
If the fence has rails, make sure they are attached tightly. Nail them to the posts well.
Rails must be strong, or the fence will not last long. Check the rails with a level before finishing.
Sunday Afternoon: Adding Finishing Touches Like Stain or Paint
Pick the Right Stain or Paint for Your Fence
Choose a stain or paint that works well with your fence material. If your fence is wood, pick an oil-based stain to keep the wood grain visible.
If you want more color options, use acrylic paint. Make sure the stain or paint is made for outdoor use. This will help your fence last longer.
Clean the Fence Before You Start
Make sure the fence is clean before applying stain or paint. Dirt, dust, and sawdust can stop the finish from sticking well.
Use a power washer to remove dirt. If you do not have one, use a scrub brush with mild soap and water.
Let the fence dry completely before moving to the next step.
Use a Good Brush or Sprayer for a Smooth Finish
A good-quality brush or sprayer will help you apply stains or paint evenly. A brush is best for small areas and detailed parts.
A sprayer covers large sections faster. Choose the right tool based on your fence size. A smooth finish will make the fence look more professional.
Add a Clear Sealer for Protection
After you finish staining or painting, apply a clear sealer over the fence. This will protect it from rain, sun, and mold.
The sealer keeps the color looking fresh for a long time. It also helps the wood stay strong and last longer.
Work in Small Sections for Even Coverage
Do not rush when applying the stain or paint. Work in small sections. Apply a thin coat instead of a thick one.
A thick coat can drip and leave uneven marks. Let each coat dry before adding another layer. This will make the fence look smooth and neat.
Pay Extra Attention to Hard-to-Reach Areas
Some parts of the fence are harder to reach, like the bottom of the posts and the edges of the rails.
These areas often get more damage from rain and dirt. Make sure to cover them well with stain or paint.
This will help the whole fence stay strong.
Let the Fence Dry Completely
After applying stain or paint, let the fence dry completely. The drying time depends on the type of product used.
Most stains dry faster than paint. In most cases, you should wait at least 24 to 48 hours before touching or using the fence.
Check for Missed Spots and Fix Them
Once the finish is dry, walk around the fence and look for spots you may have missed.
If you see any areas with thin or uneven coverage, use a small brush or roller to fix them.
This will help the fence look even and well-finished.
How to Avoid Common Time-Wasting Mistakes
Do Not Skip the Planning Stage
Some people start the project without a plan. This can cause mistakes and wasted materials. It can also lead to confusion.
It is important to plan everything before you start. Measure the area. Pick the right materials.
Gather all the tools you need. The best time to do this is on Friday evening. A good plan helps you save time on the weekend.
Make Sure Post Holes Have the Right Measurements
Digging post holes the wrong way can be a big problem. If the holes are too shallow, the posts will not be stable.
If the holes are too wide, you will need extra concrete. This will waste time. Use a post hole digger or an auger.
Dig the holes to the correct depth. Most of the time, the depth should be one-third of the post’s length.
Before you pour concrete, use a measuring tape to check the hole size. This will help you avoid mistakes.
Prepare Fence Panels Before Installing Them
Some people attach pickets or panels one at a time. This takes a long time. It is better to prepare panels before installing them.
If you build the panels in advance, you only need to lift and attach them. This will save time.
It also makes the installation process easier.
Use the Right Tools for the Job
If you do not have the right tools, the project will take longer. Using the wrong tools can also make the job harder.
You need a nail gun, level, measuring tape, post hole digger, and saw. Check all your tools before starting.
A good time to do this is on Friday night. Make sure they are working properly.
Let the Concrete Set Before Attaching Panels
Some people install fence panels before the concrete is ready. This is a mistake. If the concrete is still soft, the posts can move.
This will make the fence uneven. It can also make it weak. You need to wait for the concrete to harden.
The best time to attach panels is after 4-6 hours. For the best results, wait overnight.
Weekend Fence Building Pro Tips
Work Smart and Plan Your Tasks
Do not try to do everything at once. Break the project into small parts. Give each task a time limit.
If you have help, divide the work. One person can dig holes. Another person can install posts.
Someone else can attach panels. This will help you finish faster.
Use a Laser Level for Straight Posts
A laser level is better than a regular level. It helps you keep all posts straight. A laser can show the correct position from far away.
This is helpful when building a long fence. It prevents mistakes that take time to fix later.
Pre-Drill Holes in Panels and Pickets
Drilling holes in advance makes work easier. It helps you attach panels or pickets faster.
It also prevents wood from splitting. If the holes are already there, you do not need to measure again while installing.
Choose Quick-Setting Concrete
Quick-setting concrete dries faster than regular concrete. It allows you to move to the next step sooner.
This is useful if you need to finish the fence in a short time. It makes the process smoother and faster.
Protect Your Fence Posts from Water
Water can damage wood posts over time. Use a water-resistant treatment to protect them.
Pressure-treated wood is a good option. If the bottom of the post stays dry, the fence will last longer.
Measure the Gate Area Before Attaching It
Gates need extra space to open and close. If the opening is too small, the gate will not fit. If it is too big, it may be unstable.
Measure carefully before attaching the gate. This will prevent problems later. Less Risk of Wood Splitting
My Final Words
Building a garden fence on a weekend is possible. With the right tools and a good plan, you can finish the job quickly. A nail gun makes the task faster and easier.
Remember to take your time with each step. Measure carefully and check your work. Make sure the posts are strong and the panels are straight.
Once your fence is up, you will have a beautiful addition to your garden. It will protect your plants and give your yard a clean, finished look. Enjoy your hard work and the privacy your new fence provides!
FAQs on How to Build a Garden Fence with a Nail Gun
How long does it take to build a garden fence?
Ans: Building a garden fence usually takes one weekend. The exact time depends on your yard size and the number of people helping. Plan for at least two full days of work.
What tools do I need to build a garden fence?
Ans: You will need a nail gun, measuring tape, a level, a post hole digger or auger, a saw, and concrete. Be sure to check that all your tools are ready before you begin.
Can I use a regular hammer instead of a nail gun?
Ans: Yes, you can use a hammer. However, a nail gun will help you finish faster and make the job easier. It also gives you a more consistent and even result.
How deep should I dig the post holes?
Ans: Dig each post hole at least 1/3 of the height of the fence post. For example, if your posts are 6 feet tall, dig the hole 2 feet deep.
Can I build a fence without any help?
Ans: You can build a fence alone, but it will be faster if you have help. Getting someone to assist with holding posts or panels can save you time and effort.
How long should I wait for the concrete to set?
Ans: Wait for at least 4-6 hours for the concrete to set. For the best results, it is best to let the concrete cure overnight before making adjustments.
What type of nails should I use for a garden fence?
Ans: Use galvanized or stainless steel nails. These nails resist rust and will help your fence last longer, even in wet weather.
What kind of fence is best for a garden?
Ans: Wood is a popular choice because it is strong and looks natural. You can also use vinyl or composite materials if you want something that needs less care. Pick the material that fits your budget and style.