
Nail guns can get dirty from dust, grease, and debris. Cleaning your nail gun is important to keep it working well. It helps prevent problems like jams, misfires, or decreased performance.
Regular cleaning can extend the life of your nail gun and make sure it works safely. If you don’t clean them, these things can build up inside and affect the tool.
This guide will show you simple steps to clean your nail gun properly. Whether you use it often or just sometimes, cleaning it is easy and keeps it in good shape.
How to Clear a Jammed Nail Gun? Step-by-Step
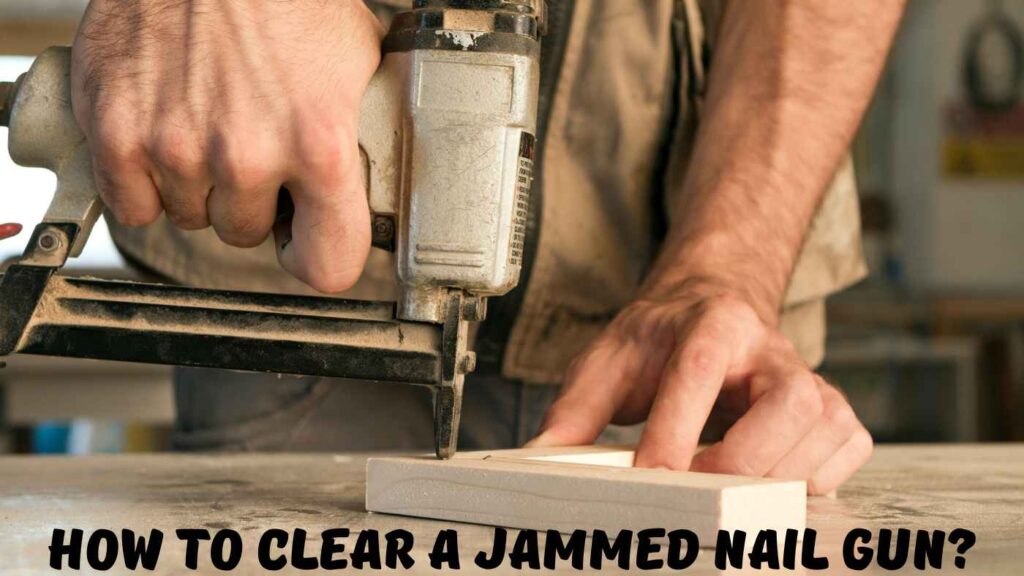
Ensure Safety First
First, make sure the nail gun is not connected to power. Unplug electric models, remove the battery from cordless models, or disconnect the air hose from pneumatic nail guns.
Take out any nails from the magazine. This will stop accidental firing while you clean. Wear safety goggles to protect your eyes from dust. Gloves will protect your hands from cleaning solutions and sharp parts.
Disassemble the Nail Gun (If Required)
Check the manufacturer’s manual to see which parts can be safely removed for cleaning.
Use hex keys or screwdrivers to remove parts like the magazine or nosepiece. Keep the screws and small parts in a safe place so they are easy to find when reassembling.
Remove Dirt and Debris
Use compressed air to blow out dust and dirt from inside the nail gun. Focus on areas around the firing mechanism.
Use a small brush or cotton swab to clean any stubborn dirt in tight spaces. Wipe the outside of the nail gun with a soft, dry cloth. This removes surface dust and fingerprints.
Clean Internal Components
Apply a small amount of mild detergent or degreaser to a cloth. Wipe down the metal parts to remove grease and dirt.
Be careful not to use too much liquid. Excess liquid can damage the parts. Dry all parts with a clean cloth before moving on to the next step.
Lubricate Moving Parts
Put a few drops of lubricating oil on the moving parts. Focus on the firing mechanism, O-rings, and piston.
Spread the oil evenly and wipe away any extra oil. Too much oil can attract dust. Make sure the oil you use works with your type of nail gun.
Inspect for Wear and Damage
Look at the O-rings and seals. Check for cracks or wear. Replace them if needed. Check for bent or damaged parts that might cause problems.
Make sure all screws and parts are secure before you start putting the nail gun back together.
Reassemble the Nail Gun
Carefully put all parts back together in the opposite order of how you took them apart. Tighten all screws, but do not over-tighten them.
Over-tightening can damage the parts. Make sure the magazine is aligned correctly to avoid jamming problems.
Test the Nail Gun
Reconnect the power or air hose. Load a few nails into the magazine. Test the nail gun by firing it into scrap wood. This checks if it works smoothly.
How to Clean Different Types of Nail Guns
Cleaning a Pneumatic Nail Gun
First, disconnect the air hose and remove any nails from the magazine. Use compressed air to blow out any dust from the air inlet and internal parts.
Wipe the outside of the nail gun with a cloth. Add a few drops of pneumatic tool oil to the air inlet. Check the O-rings and seals for damage. If you see any cracks or wear, replace them.
Cleaning a Battery Powered Nail Gun
Remove the battery from the nail gun. Empty the magazine of any nails. Use a dry cloth and a small brush to clean the firing mechanism and vents.
Do not use too much moisture to avoid damaging the electrical parts. Check the battery contacts for dust or corrosion. Wipe them clean with a dry cloth.
Cleaning an Electric Nail Gun (Corded)
Unplug the nail gun before cleaning. Remove any nails that are left in the magazine. Use a soft brush or compressed air to clean the vents and trigger area.
Wipe the outside of the nail gun with a dry cloth to remove any dust. Check the power cord for any damage or wear. If there is any visible damage, it may need repair.
Cleaning a Gas Powered Nail Gun
Remove the fuel cell and the battery from the tool before cleaning. Use a lint free cloth to wipe the ignition system and exhaust ports.
Clean the combustion chamber with a soft brush to remove carbon buildup. Apply lubricant to the moving parts, but do not over oil. Too much oil can attract dirt.
Cleaning a Brad or Finish Nail Gun
Take out any nails and wipe the magazine with a dry cloth. Use compressed air to blow dust out of the firing mechanism.
Apply a small amount of oil to the piston and other moving parts. This keeps the parts working smoothly.
Look for any nail residue and scrape it off gently if needed.
Cleaning a Framing Nail Gun
Framing nail guns are used for heavy-duty tasks. Clean them after every use. Use a degreaser to remove dirt and grime from the firing mechanism.
Check the magazine for any bent nails or debris that could cause jams. Lubricate the tool after cleaning to keep it in good working condition.
Cleaning a Roofing Nail Gun
Roofing nail guns gather shingle dust and other debris. Clean them often. Remove any nails and use compressed air to clear the feed system of dust.
Wipe the tool with a damp cloth and let it dry completely before putting it away. Check the depth adjustment mechanism and lubricate it if needed.
Cleaning a Palm Nail Gun
Palm nailers are small, so use a small brush to clean around the firing area. Wipe the outside with a dry or slightly damp cloth to remove grime.
Put a drop of oil on the internal mechanism to keep it working smoothly. Store the palm nail gun in a dry place to avoid rust and moisture damage.
What can I use to clean a nail gun?
Soft Clothes and Rags
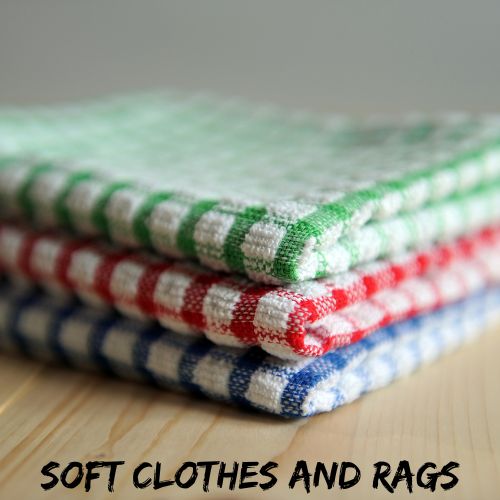
Use soft cloths to wipe the outside and inside of the nail gun. A lint free cloth is best because it does not leave fibers behind. This helps keep the tool clean without adding extra dirt.
Compressed Air or Small Brush
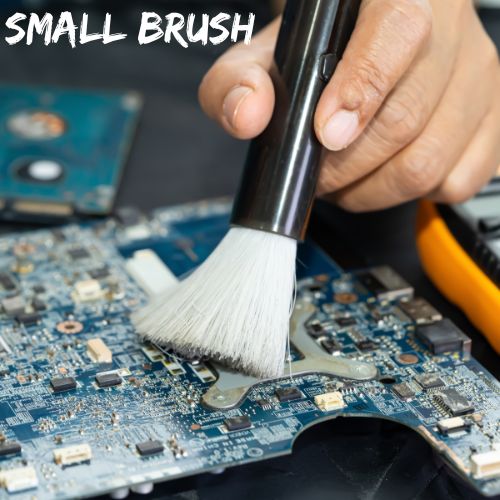
Use compressed air to blow away dust, debris, and nail residue from hard-to-reach places.
A small brush can also be used to clean tight spots. Compressed air works well for cleaning vents and other small areas inside the nail gun.
Mild Detergent or Degreaser
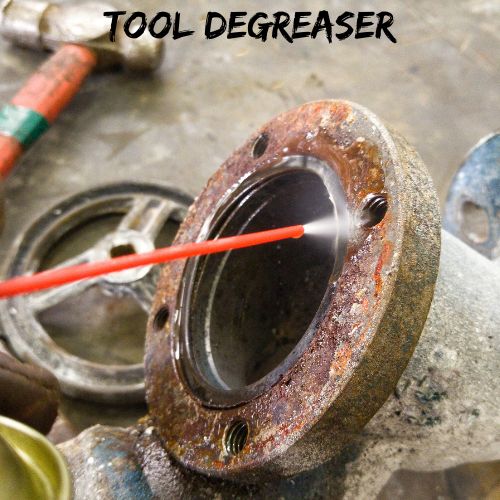
A mild detergent or degreaser removes grease, oil, and dirt without harming the parts.
Choose a non corrosive cleaner. This ensures that the metal and plastic parts stay safe during cleaning.
Lubricating Oil
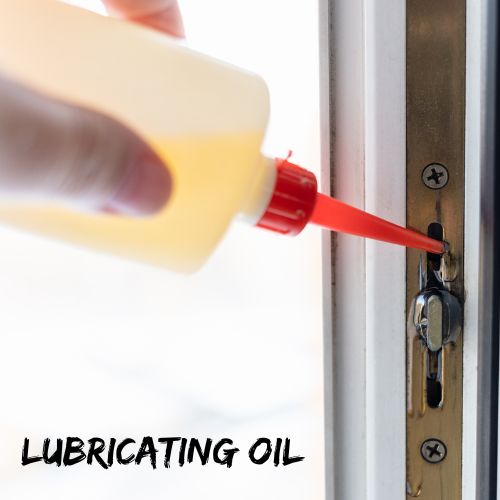
Lubricating oil keeps moving parts running smoothly. It prevents rust from forming on internal parts. Especially pneumatic nail guns require oil.
Apply a few drops of oil to reduce friction and wear. This keeps the nail gun working properly. Therefore, to keep your nail gun clean, you have to know how to oil a nail gun.
Hex Keys and Screwdrivers
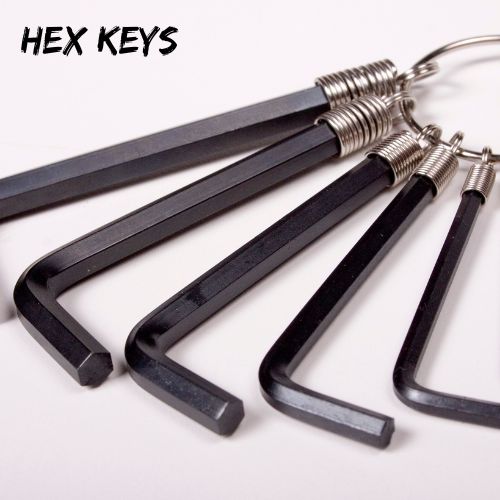
Hex keys and screwdrivers help you take apart parts of the nail gun. You may need to remove screws to clean deeply inside the tool. The right sized tools make it easier and safer to disassemble the nail gun.
Cotton Swabs and Toothpicks
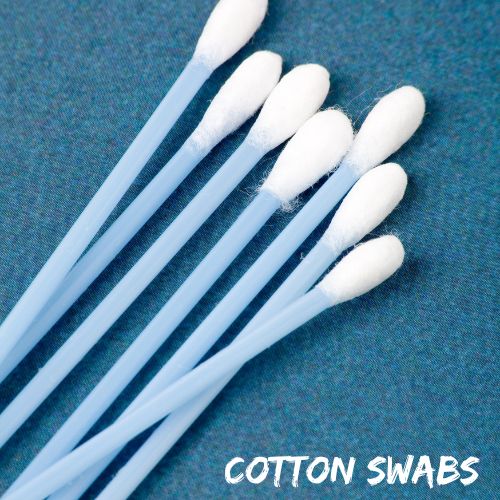
Cotton swabs and toothpicks help clean small spaces. They are great for cleaning the firing mechanism and trigger parts.
These tools reach tiny areas where dirt builds up without scratching the surfaces.
Manufacturer’s Manual
The manufacturer’s manual gives important cleaning instructions. It tells you where to apply oil and how to take apart the nail gun safely. Following these instructions prevents mistakes that could damage the tool.
How Often Should You Clean Your Nail Gun?
After Every Use for Basic Maintenance
After each use, wipe down the outside of the nail gun. Remove any visible dust and check for debris in the magazine.
A quick clean will stop dirt from building up. It keeps the nail gun working smoothly for the next time you use it.
Weekly for Moderate Use
If you use your nail gun regularly but not every day, clean it once a week. This includes cleaning the firing mechanism, adding lubrication to moving parts, and checking for minor wear.
Weekly cleaning helps keep the tool performing well and prevents problems from happening unexpectedly.
Daily for Heavy Duty or Professional Use
If you use the nail gun all day, every day, clean it at the end of each workday. Heavy use causes dirt to build up faster.
This increases the chances of jams and misfires. Cleaning daily prevents these issues and keeps the tool in good working condition.
After Working in Dusty or Harsh Environments
Construction sites, woodworking shops, and outdoor jobs can expose the nail gun to a lot of dust.
Clean your tool right after using it in these environments. This stops dust and debris from clogging the nail gun and causing it to wear out faster.
After 5000–10000 Shots for Pneumatic Nailers
For pneumatic nail guns, clean the tool after firing a certain number of shots. This number is usually between 5000 and 10000 shots, depending on the manufacturer’s guidelines.
Regular cleaning at these intervals ensures the air pressure is steady and the firing is accurate.
Monthly Deep Cleaning for Longevity
Even if you clean your tool often, do a deeper cleaning once a month. This removes any hidden dirt and stops internal parts from wearing out.
A deep clean includes taking apart key components and putting fresh lubrication on them.
Before and After Long-Term Storage
Before storing your nail gun for a long time, clean and lubricate it. This prevents rust from forming while it is stored.
When taking the tool out of storage, check for dust and ensure all parts work properly before using it.
When You Notice Performance Issues
If your nail gun misfires, jams, or works slowly, clean it immediately. Cleaning may fix these issues and prevent them from getting worse.
Ignoring these problems can cause bigger damage over time.
Signs of Wear and Tear to Check During Cleaning
Worn or Cracked O-Rings
O-rings seal and keep air pressure in pneumatic nail guns. Look for cracks, splits, or wear.
Damaged O-rings can cause air leaks and loss of power. Replace any broken O-rings to keep the gun working well.
Brittle or Cracked Seals
Seals stop air or fluid leaks and ensure correct pressure while firing. Check for cracks or brittleness around the air inlet or other parts.
Broken seals can cause firing problems. Replace them to keep firing consistent.
Excessive Rust or Corrosion on Metal Parts
Rust or corrosion can weaken the metal parts of your nail gun. Look at the frame, magazine, and other metal parts for rust.
Clean the rust and apply lubricant to stop it from getting worse.
Worn Firing Pin or Piston
The firing pin and piston are important for the gun to fire nails. Check for dents, scratches, or broken edges.
A damaged firing pin or piston can cause misfires or poor firing. Replace worn parts to keep the gun working properly.
Loose or Worn Fasteners
Check all screws, bolts, and fasteners to make sure they are tight. Loose parts can make the tool misalign.
This can cause poor performance and possible damage. Tighten or replace fasteners if needed.
Worn Trigger Mechanism
The trigger should work smoothly. If it is hard to press, sticks, or does not engage fully, it could be worn or dirty.
Clean the trigger and check for any damage. If needed, replace the trigger to restore smooth operation.
Damaged or Bent Magazine
The magazine holds and feeds the nails. Check for bends, cracks, or damage.
A damaged magazine can cause nail jams or feed issues. Replace a broken magazine to avoid problems.
Worn Out or Missing Safety Features
Safety features like safety tips and lockouts prevent accidents. Check these features during cleaning.
If they are damaged or missing, the tool could be unsafe. Replace any damaged or missing safety parts.
Conclusion
Cleaning your nail gun helps it deliver better performance and longevity. A simple routine of cleaning away the dust, removing stuck nails, adding a couple of drops of oil, and dry place storing prevents problems and keeps your nail gun in tip top shape.
Whether you are a pro or just working on home projects, a clean nail gun will make your job easier and more efficient. Take a few minutes to maintain it and you’ll get smooth, hassle free results every time.
A clean nail gun will keep your mind clean during work!
FAQs
What can I use to clean my nail gun if I don’t have a nail gun cleaner?
Ans: If you don’t have a nail gun cleaner, you can still clean your nail gun. Isopropyl alcohol works well for sticky residues.
A mild degreaser is good for grease and oil buildup. Compressed air can help blow out dust and debris from inside. A soft cloth with soap and water can clean the outside and plastic parts.
Can I use WD-40 to clean my nail gun?
Ans: Yes, you can use WD-40 to clean the metal parts and stop rust. It can also lubricate the moving parts.
However, you should not use too much WD-40. It can attract dirt over time. After applying, be sure to wipe away any excess to prevent dirt buildup.
Can I use water to clean my nail gun?
Ans: You can use water to clean the plastic parts or the outside of the tool. However, do not soak the tool or let water get inside the internal parts. Always dry the tool completely after cleaning to avoid rust or damage.
Is it necessary to disassemble my nail gun to clean it?
Ans: It depends on the tool. For basic cleaning, you don’t have to take the nail gun apart. You can clean the outside, magazine, and trigger area with a cloth, brush, and compressed air.
For a deeper clean, or to remove stubborn residues, you may need to disassemble the nail gun.
How do I clean the firing mechanism?
Ans: To clean the firing mechanism, use compressed air to blow out dirt and dust. If there is sticky residue or heavy grime, use isopropyl alcohol.
You may need a small brush to reach tight spaces. After cleaning, lubricate the firing mechanism to keep it working smoothly.
How do I clean a nail gun after using adhesive coated nails?
Ans: After using adhesive coated nails, residue may build up inside the nail gun. First, remove the nails.
Then use a cloth with isopropyl alcohol or adhesive remover to clean the magazine and internal parts. After cleaning, lubricate the moving parts to keep the tool working well.
Is it safe to use brake cleaner on a nail gun?
Ans: Brake cleaners can be used for tough cleaning, especially on metal parts with grime.
Be careful because brake cleaner is a strong solvent. Always use it in a well-ventilated space and follow up with lubrication to prevent parts from drying out.
How do I clean the air passages on a pneumatic nail gun?
Ans: To clean the air passages, disconnect the air supply. Then use compressed air to blow out dust or debris from the nozzle and air chamber.
You can also wipe the air passages with a cloth. Make sure the tool is dry before reconnecting the air supply.
Can I use alcohol wipes to clean my nail gun?
Ans: Alcohol wipes are good for cleaning small areas, especially if there is sticky residue or grease.
However, they may not be enough for a full cleaning. For deep cleaning, use a combination of a soft cloth, compressed air, and the right cleaning solutions.
How do I clean the O-rings and seals of a nail gun?
Ans: To clean O-rings and seals, use a soft cloth and a light lubricant like silicone spray. Do not use harsh solvents that can damage the rubber. Keeping these parts clean and lubricated will help your nail gun last longer and work better.