
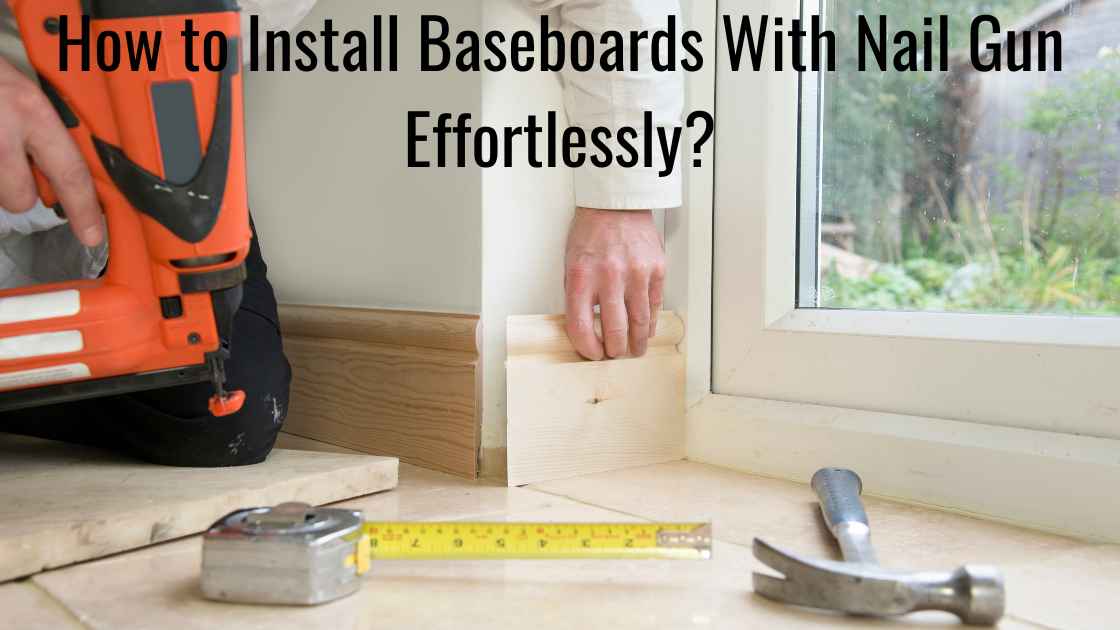
Installing baseboards with a nail gun is a simple way to make a room look better. Baseboards cover the bottom of the walls and give a clean finish.
A nail gun helps attach them quickly and easily. This tool drives nails into the baseboard and holds it firmly in place. It saves time and effort compared to using a hammer.
Proper installation is important for a smooth and professional look. You need to measure, cut, and secure each piece carefully.
Why Use a Nail Gun for Baseboards?
Speed of Installation
A nail gun helps you install baseboards much faster. You do not need to hammer each nail one by one.
You can press the trigger, and the nail will go in instantly. This saves a lot of time. It is very helpful when you are working on a big room or many rooms.
Consistent Nail Placement
A nail gun places every nail at the same depth. It also keeps all the nails at the same angle.
This makes your baseboards look even and smooth. You will not have nails sticking out or going too deep. The final look will be neat and professional.
Reduced Physical Strain
A hammer requires a lot of effort. You have to swing your arm again and again. This can make your arms and hands tired.
A nail gun only needs a simple press. It is much easier on your body. This is very helpful if you have weak hands or need to install many baseboards.
Versatility with Nail Types
A nail gun works with different types of nails. You can use short or long nails.
You can also use nails that are good for softwood, hardwood, or MDF. This makes the nail gun a useful tool for any type of baseboard you are installing.
Less Risk of Damage
A hammer can easily damage the baseboards. If you hit too hard, the wood can split. You may also leave dents if you miss the nail.
A nail gun pushes the nail in smoothly without extra force. This keeps your baseboards looking clean and undamaged.
Enhanced Precision
A nail gun lets you control how deep the nails go. It also helps you place nails exactly where they need to be.
This is important when working in tight spaces or corners. You can make sure each nail holds the baseboard firmly in place.
Improved Final Appearance
Baseboards look better when nails are placed neatly. A nail gun makes sure there are no big holes or uneven nails.
The surface stays smooth. This makes the room look more polished. A clean finish can also increase the value of your home.
How to Install Baseboards With Nail Gun: Step-by-Step
Position the Baseboards
Take the baseboards and place them against the wall. Make sure they are in the correct position. Align them with the wall studs that you marked earlier.
Use a level to check if the baseboards are straight. Adjust them if needed. If the wall is long, start at one end.
Work your way to the other end. Keep checking the alignment to make sure everything is even.
Nail the Baseboards in Place
Hold the baseboard firmly against the wall. Take your nail gun and place the tip on the board.
Fire a nail into the first wall stud. Move along the baseboard and place nails every 16 to 24 inches.
Make sure to angle the nails slightly. This will help the baseboards stay in place better. It will also stop the wood from splitting.
Secure Corners and Joints
Check the corners and joints where the two baseboards meet. The pieces must fit tightly together. If they do not fit well, trim them.
Use a miter saw to cut the edges at a 45-degree angle. This will help them fit neatly. Once they are in place, nail them securely.
Check the alignment one more time before moving on. If you see any small gaps, you can fix them later with wood filler.
Fill Nail Holes
Look for the small holes where the nails went in. Take some wood filler and a putty knife. Apply the filler to each hole.
Spread it evenly so that the surface is smooth. Make sure it is level with the wood.
Let the filler dry completely. Follow the drying time on the package. Once dry, it will blend in with the baseboards.
Caulk the Edges
Take a caulking gun and apply caulk along the edges. Do this where the baseboards touch the wall and the floor.
The caulk will cover small gaps and give a clean finish. Apply a thin, even line of caulk. Use your finger or a smoothing tool to spread it neatly. This will make the baseboards look more professional.
Sand and Smooth the Surface
Once the wood filler is completely dry, check the surface. If it feels rough, take some fine-grit sandpaper.
Lightly sand the filled areas. This will make them smooth and even. Do not press too hard.
After sanding, wipe away any dust with a damp cloth. This will get the baseboards ready for painting or staining.
Paint or Stain the Baseboards
If the baseboards are not pre-finished, you need to paint or stain them. Pick a high-quality paint or stain that matches your room.
Use a brush or a small roller. Apply the paint in even strokes. If you are painting, use a primer first.
This will help the paint stick better. Let the first coat dry. If needed, apply a second coat for a better finish.
Final Inspection
Once the baseboards are completely dry, take a final look at them. Check if they are straight. Look for any gaps or rough spots.
Fix any small issues. Touch up the paint if needed. Clean up your work area. Step back and admire the new look of your room. The baseboards should now look smooth and professional.
Nail Gun PSI for Baseboards
When using a nail gun to install baseboards, the air pressure (PSI) you need depends on the type of nail gun.
Brad Nailer (18-gauge): 70-90 PSI
Best for thinner baseboards or delicate trim to avoid cracking the wood.
Finish Nailer (15 or 16-gauge): 70-100 PSI
Stronger and better for thicker baseboards since it holds them more securely.
Pneumatic Nail Gun Requirements
Ensure your air compressor can maintain the required PSI with sufficient CFM (Cubic Feet per Minute).
Start at 70 PSI and adjust upward if nails aren’t sinking flush. Avoid going too high to prevent overdriving the nails.
Handling Corners & Joints When Installing Baseboards With a Nail Gun
Understanding Corner Types
There are two main types of corners. One type is an inside corner. The other type is an outside corner.
Inside corners form when two walls meet at a 90-degree angle. Outside corners extend outward and wrap around a corner.
Each type needs a different method to cut and join the baseboards properly.
Cutting Baseboards for Inside Corners
Inside corners need angled cuts. Use a miter saw to cut the ends of the baseboards at a 45-degree angle.
The two pieces should fit together neatly in the corner. Make sure the saw blade is positioned correctly.
This will help create a smooth beveled edge. Check the angles carefully before cutting. If the angles are not correct, there may be gaps in the corner.
Cutting Baseboards for Outside Corners
Outside corners also need miter cuts. Cut each baseboard at a 45 degree angle. The cuts must go in the opposite direction of each other.
When placed together, the two pieces should form a clean edge. This will make the outside corner look neat. Be sure to measure the cuts correctly before cutting. Small mistakes can cause misalignment.
Dry Fitting Pieces Before Nailing
Before nailing, place the baseboards against the wall. Check if the corners and joints fit well. If the baseboards do not line up correctly, adjust them. If the cuts are not precise, trim them a little more.
This step helps to avoid problems after nailing the boards in place. A perfect fit will make the installation look more professional.
Nailing into Studs at Corners
Secure the baseboards by nailing them into the wall studs. Hold the baseboard pieces in position.
Make sure the mitered corners are tight together. Use a nail gun to fasten the baseboards.
Place nails every 16 to 24 inches along the length. Add extra nails near the corners. This will keep the baseboards from shifting.
Expert Tips for Seamless Use of Nail Gun for Baseboard
Use a High-Quality Nail Gun
Buy a strong and good-quality nail gun. A finish nail gun is the best choice for baseboards. It puts nails in without harming the wood.
A good nail gun makes sure the nails go in at the right depth. It helps keep the baseboards smooth and neat.
It also lowers the chance of breaking the wood. A strong nail gun makes the job easier and faster.
Select the Right Nails
Pick the correct nail size for baseboards. Nails that are 2 to 2.5 inches long are the best option.
The right nails go deep into the wall and keep the baseboard in place.
They hold well but do not poke through the wood. This keeps the baseboard secure and looking clean.
Cut with Precision
Use a miter saw to make straight and even cuts. This is very important for corners and joints. If the cuts are not accurate, there will be gaps between the baseboards.
This will not look good. If the cuts are clean, the baseboards will fit together perfectly. Always measure carefully before cutting to avoid mistakes.
Keep Baseboards Clean
Wipe the baseboards before installing them. Remove any dust or dirt. A clean baseboard helps the caulk and paint stick better.
If there is dust, the paint may look rough. Cleaning before installation helps make the final look smooth and neat.
Nail Placement Matters
Put nails every 16 to 24 inches. Add more nails in the corners and where the two boards meet. If the nails are too far apart, the baseboards may become loose.
Nails in the right places keep the baseboards steady. Corners and joints need extra nails so they stay in place.
Allow for Expansion
Leave a small gap between the baseboards and the wall. This allows the wood to expand when the temperature changes.
Wood can change size when it gets warm or cold. If there is no space, the baseboard may crack or bend.
A small gap lets the wood move naturally. Caulk can fill the gap after installation for a smooth look.
Techniques for Installing Baseboards With Nail Guns on Uneven Walls
Assess the Wall’s Condition
First, check the wall carefully. Look for any uneven areas or rough spots. Some walls have bumps, dips, or other problems.
These can make it hard to install baseboards properly. If you know where the uneven spots are, you can plan the best way to fix them. This will help the baseboards fit better and look smooth.
Use a Flexible Baseboard
Choose a flexible baseboard. It can bend slightly to match the shape of the wall. Some materials are soft and can curve when needed.
These materials help baseboards stay close to the wall, even if the wall is not straight. This reduces gaps and makes the installation look neat and finished.
Cut Baseboards with a Coping Method
Use a coping saw to cut inside corners. Do not use a miter saw for these cuts. A coped joint lets one piece of baseboard fit tightly over the other.
This works better than a miter cut when the wall is uneven. It hides small gaps and helps the corners look smooth and professional.
Use Shims for Adjustment
Place thin wood shims behind the baseboard where the wall is uneven. Some parts of the wall may be lower than others.
If the baseboard does not touch the wall evenly, you can lift it slightly with shims. Nail the baseboard into place after adjusting it. This keeps the baseboard straight and prevents gaps.
Trim the Bottom Edge of the Baseboards
If the floor or wall is very uneven, trim the bottom of the baseboard to fit. Some walls have large dips or bumps at the bottom.
If you trim the baseboard to match the shape of the wall, it will fit better. Use a jigsaw or circular saw for this step. Be careful and cut slowly to make sure the baseboard keeps a smooth shape.
Install a Chair Rail or Trim
Add a chair rail or extra trim to hide any big gaps between the baseboard and the wall. If the wall is very uneven, even a well-installed baseboard might not look perfect.
Adding a chair rail or another piece of trim can help hide gaps. This also adds a nice decorative touch to the room.
Finish with Paint or Stain
After everything is installed, paint or stain the baseboards for a finished look. Painting or staining makes the baseboards look smooth and polished.
It also protects the wood and helps it last longer. If you had to make adjustments to fit an uneven wall, a fresh coat of paint can help everything look even and seamless.
My Final Words
Installing baseboards with a nail gun can be a rewarding project. It adds style and character to your space. Following the steps in this guide will help you achieve a professional look.
Remember to measure and cut carefully. Use a level to ensure straight lines. Fill in any gaps or holes for a clean finish.
Caulk along the edges for a polished appearance. Once everything is in place, consider painting or staining the baseboards. This will enhance their beauty and protect the material.
With patience and attention to detail, you can complete this project successfully and enjoy your beautiful new baseboards.
FAQs on How to Install Baseboards With Nail Gun
What type of nail gun is best for installing baseboards?
Ans: A finish nail gun is the best choice for installing baseboards. It can drive nails without damaging the wood. This tool also provides a clean finish for your project.
How long should the nails be for baseboard installation?
Ans: Generally, 2 to 2.5-inch finishing nails work best for baseboards. This length helps the nails hold securely without sticking out through the wood.
How do I measure and cut baseboards accurately?
Ans: Start by measuring the lengths of the walls where you want to install the baseboards.
Use a miter saw for precise cuts, especially at corners and joints. It is important to measure twice before cutting to avoid mistakes.
What should I do if my walls are uneven?
Ans: If your walls are uneven, use shims to adjust the baseboards in lower spots. You can also consider using flexible baseboards or a coping method for inside corners. These options help fit the baseboards better against the wall.
How can I fill the gaps between the baseboards and the wall?
Ans: You can use caulk to fill any gaps between the baseboards and the wall.
Apply a thin bead of caulk and smooth it out. This will help create a clean and finished look.
Can I paint or stain my baseboards after installation?
Ans: Yes, you can paint or stain your baseboards after you install them.
Make sure any wood filler is dry and sanded smooth before applying your chosen finish. This will help ensure the best results.