
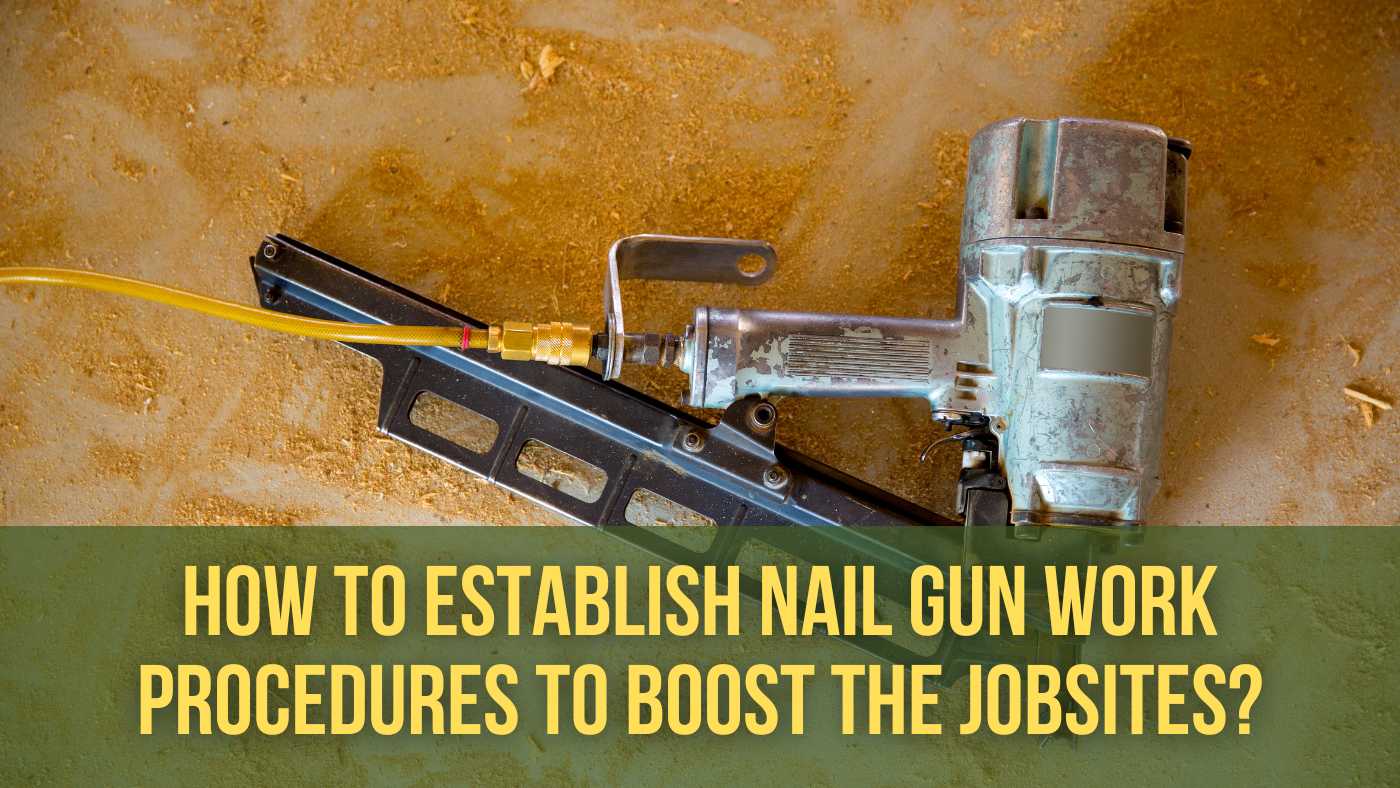
Setting clear nail gun work procedures in the workplace will save time, prevent injuries, and ensure top quality results. Emergency work procedures will tackle your construction or DIY projects.
Improper nailer gun work procedures will enhance the risk of accidents or mistakes. that will lead you to injuries or damage. So, establishing proper gun nailer procedures is essential for every user, in every worksite.
Why Nail Gun Work Procedures Matter

Regular maintenance, correct usage, and proper storage are all part of nailer gun work procedures. Furthermore, standardized work procedures contribute to tool longevity.
Let’s discover the importance of gun nailers’ Work Procedures:
Preventing Accidents
- Gun nailer work procedures prevent unwanted accidents or injuries.
- Effective procedures reduce human errors.
- Ensure flawless completion of projects.
Increase Efficiency
- Boost productivity
- Workers know exactly what to do.
- Procedures streamline tasks
- Eliminates work confusion, and guesswork.
- Ensure consistency across projects
Compliance Assurance
- Many jurisdictions need documented safety protocols where nail guns are involved.
- Assist in meeting safety standards.
- Work procedures are committed to due diligence during work.
Establishing Step-by-Step Nail Gun Work Procedures
I have divided the procedures into 3 divisions based on the job preparation.
- Pre-operation
- Operation
- Post-operation
Here is a guide to developing nailer gun work procedures to assure safety, efficiency, and precision.
1. Pre-Operation
a. Inspect the Worksite
First, try to ensure the workspace is clean and free from hazards. Check if there are any obstructions, uneven surfaces, or wet areas.
b. Select the Best Nail Gun
When your workplace is ready, then go to choose the right nail gun. The right nail gun will be based on the project and materials. For example, for framing or fencing jobs you need a framing nail gun.
c. Check the Nailer Gun
When you finally select a nail gun for your project, check your tool instantly. Check if there are any leaks, damage, or loose parts. In terms of cordless nail guns, check if your batteries are fully charged.
d. Gather Safety Gear
Collect the required safety gear before starting the tool operation. Wear safety glasses to protect your eyes from flying dust.
Use ear protection to shield your ear against loud noise. Collect gloves for hand protection and sturdy shoes for toe safety.
e. Read the Manufacturers’ Manual
Many users ignore the manuals given by the manufacturers. Read the manual to learn the manufacturer’s operating instructions.
It will help you understand the nail gun’s unique features like trigger mechanism, nail compatibility, etc.
f. Safe Working Zone
Develop a safe workplace and clear the surroundings free from non-essential personnel and bystanders.
g. Permits or Clearance
Some areas or regions often require permission or clearance to use nail guns. Because it is a powerful tool, and enough risky to operate. Hence, you need to fulfill the requirements to obtain permission.
h. Communicate & Coordinate
Try to communicate or coordinate with other workers who are working in close proximity. Moreover, communicate with the workers who are particularly working at heights.
This preparation will ensure a safe working environment.
i. Training
Ensure that you have enough training and practice regarding nail gun use. If you have workers, then ensure workers training in regular cycles like monthly, quarterly, and yearly.
If any new worker joins your workshop or factory then you can arrange foundation training for them. In foundation training, they will learn the basic concept of nail gun operation.
2. Operation
a. Loading the Nail Gun
Load the right size of nails in the nail gun magazine. In terms of pneumatic models, disconnect the tool from air compressors before loading nails.
Reconnect the power sources consequently. Never load nails beyond the magazine capacity.
b. Test on Scrap Material
After successful loading, test on scrap pieces of materials to justify the depth and overall mechanism. You can apply them to your main project materials if it is fine.
c. Tool Positioning
Hold the nail gun comfortably with one hand. Align the tool nosepiece squarely. Try to aim your nailer gun accurately to ensure accurate nail placement.
d. Triggering
In the case of sequential triggers just press the nosepiece before pulling the trigger finally. Then similarly release and repeat for the next nail driving.
In the case of bump firing mode, you have to be cautious. the nail will fire whenever the nosepiece is compressed while pulling the trigger.
e. Tool Understanding
Assure that you have received the necessary training regarding the manufacturer’s instructions for the specific nail gun.
f. Check Nail Size
Don’t forget to check if the loaded nails or fasteners are correct in size. Even more, ensure the correct nails are properly aligned in the magazine.
g. Do Not Rush the Job
Do the job slowly. You don’t need to be rushed during the work. Try to do the work precisely, accurately, and safely. Rushing may cause accidents or an unprofessional finish.
3. Post-Operation
a. Power Down
Don’t forget to disconnect the nail gun from its power source after completing the task. If you use a pneumatic version then release pressure from the hose before detaching.
If cordless then remove the battery to save charge.
b. Clean the Work Area
Clean the working location properly and ensure the area is free from flying dust and debris. Moreover, ensure the work area is free from unused tools or accessories.
c. Inspect the Tool
Have an overall inspection of the used gun nailer to identify if there is any visible damage or defects.
Similarly, check the trigger mechanism, contact trip, and safety features and ensure they are functioning properly.
d. Disposal of Waste Materials
It is your first duty to clean the work area, but don’t through the waste materials here and there. Safely dispose the waste materials like cut nails or broken pieces.
If you have a huge amount of waste materials then take junk removal services available in your area. Furthermore, you can also study waste management procedures.
e. Report Any Incidents
If any accidents or injuries happen during work, instantly pause the work and report to your supervisor or the designated health and tool safety representative.
It is a crucial initiative to identify potential risks or hazards.
f. Store Nail Gun Safely
After completing the task, don’t keep your used tools here and there. Store them wisely and safely in your nail gun storage area.
Store them in a dry and secured location. Keep them out of reach of your children.
Who Will Take The Responsibilities

While operating nail guns on a large scale, some unavoidable responsibilities come automatically. Only one person can’t take all the responsibilities on his shoulders.
Hence, I have divided them into four persons, such as employer, worker, supervisor, and lastly health & safety officer.
Let’s talk about them thoroughly:
Employer
Employers carry the key responsibilities on their shoulders. The employer is responsible for delivering suitable, appropriate, well maintained nail guns for his/her workers.
They will ensure the workers are well trained and skilled in using the tools. Employers should allocate the required time and resources to maintain and inspect the nail guns.
Worker
The workers’ first and foremost responsibility is to operate nail guns efficiently.
Workers need to follow manufacturers’ instructions regarding the tool mechanism. They also need to abide by the nailer gun safety guidelines.
Supervisor
Supervisors are responsible for ensuring workers’ training in safe nail gun operation. They are also responsible for supervising if the workers are following necessary safety procedures.
If any incident occurs during work, then workers will directly report to their supervisor. The supervisor will look after further procedures to mitigate the incidents.
Health & Safety Officer
Healthy and safety officers are responsible for ensuring the overall safety of nail gun users. If any accident or injuries occur, then the supervisor will inform the safety officer.
The safety officer will take the necessary steps to solve the problems instantly.
They are also responsible for ensuring the nail guns or other equipment are in good condition. Safety officers are also here to review and update the risk assessment for nail gun use.
As well as they will conduct ongoing training and guidance for workers.
Risk & Hazard Assessment While Using Nail Guns
Applications of nail guns in large or small-scale projects enhance productivity significantly. However, this effective tool comes with some inherent risks that will lead you to serious injuries.
Here is a comprehensive guide to assessing risks and hazards while using nail guns:
Identify Potential Risks
Accidental Firing
Nails can be discharged accidentally from nail guns due to faulty accessories or improper handling.
Kickback Injuries
Incorrect angles or misaligned nails in the magazine cause nails to ricochet.
Misfires
Nails or fasteners jamming in the gun nailer create dangerous situations during work. Over nail placement in the magazine and the wrong size nail cause this risk.
Trigger Malfunction
If the bump firing mode is on, unintended nail firing can happen. So, try to use the sequential trigger method.
Material Splitting
The inaccurate size of nails causes material splitting or damage. It may hamper your overall project.
Long Time Use
Operating nail guns for a longer time increases ergonomic risks. If you run this tool for a longer time it may cause hand fatigue issues.
Assess Who Might Be Harmed
Operators
The person who is operating the nail gun in the project is at the highest risk level. Workers or nail gun operators are directly connected to the tool.
They actually work behind the tools. That’s why they are always at high risk.
Bystanders or Co-workers
People or workers who are not operating the nail gun, but doing any important work near the nail gun involved project can be injured.
Beginners or Inexperienced Users
People who are unfamiliar with nail gun application can be seriously injured. They should be trained and competent to operate any nail gun.
Risk Level Evaluation
Common risks can be divided into 3 types. High risk, moderate or medium risk, and low risk. In terms of tools risk these types are discussed below.
High Risk
Working in tight spaces, elevated areas, roofing works, or where ladders are required.
Moderate Risk
General woodworking, framing, fence picketing, or carpentry works with standard nail guns can be evaluated as medium or moderate risk.
Low Risk
Light DIY projects where lightweight and compact size of electric nail guns are required. Lightweight nail guns in light-duty tasks can be evaluated as low risk.
Integrate Safety Protocols into Procedures

Ensuring safety protocols should be at the core of every nail gun work procedure.
Here I will discuss the essential safety protocols:
- Always ensure protective gear while operating the nail gun.
- Use sequential trigger instead of bump firing to ensure comfort.
- Avoid trigger mechanism modification.
- Take emergency steps like the first aid kits.
- Collect emergency contact numbers.
- Remove or replace damaged parts to avoid malfunctions.
Monitoring and Updating Procedures Over Time
Nail gun work procedures are not fixed. You need to monitor and update the procedures regularly.
Why Updates Are Necessary
- Tools need to be updated to meet protocol adjustments.
- Upgraded safety regulations may mandate procedural changes.
- Workers’ feedback can highlight the core areas for improvement.
How to Update Procedures
- Conduct annual meetings to review existing protocols.
- Analyze the existing procedures to figure out if there is any gap.
- Try to fill up the gaps with updated procedures.
- Test updated procedures on a demo project to find out any flaws.
- When the update is final, then inform it clearly to all team members and workers.
- Launch required training to adapt the nail gun users to the updated version.
Matching Tools to Tasks
Here matching tools to tasks indicates choosing the right nail gun for a project. Choosing the right tool is a simple process, but it seems like a challenge for the workers.
First, you have to consider the project and materials type. If you plan for framing or fencing projects then use raming nail guns.
For lightweight tasks use 23 gauge pin nailers. If you plan for working in tight and corner spaces then 21 or 30 degree framing nailers are perfect.
Similarly, figure out the type of material you are using in your project. In the case of dense materials like concrete or steel use powder actuated nail guns undoubtedly. For lightweight or soft materials use 18 gauge brad or pin nailers.
As a result, you will find the best tool to operate in your project. The tool like a nail gun will provide professional and aesthetic outputs.
Conclusion
Remember, nail gun safety is not just a requirement, it is a key responsibility. Establishing nail gun work procedures is a proactive step to build a safer and more efficient work environment.
So, before working with nail guns on large scales, try to develop essential work procedures. Implement the work procedures to make your project successful.
FAQs
1. How often should I review the nail gun work procedures?
Ans: You should review the nail gun work procedures once a year. Additionally, you must review the procedures if any relevant update comes in.
2. How can I ensure consistency in following nail gun procedures properly?
Ans: To ensure consistency provide regular training and courses for beginners or refreshers, recruit supervisors to monitor compliance, encourage open communication among the workers, and motivate users to inform any issue or questions to their reporting boss.
3. Is it advisable to modify a nail gun’s trigger for faster operation?
Ans: No, it is not advisable to modify nail guns’ trigger mechanisms for quicker operation. It will cause several accidents, misfires, and tool damage. Therefore, always use the trigger as it is designed.