
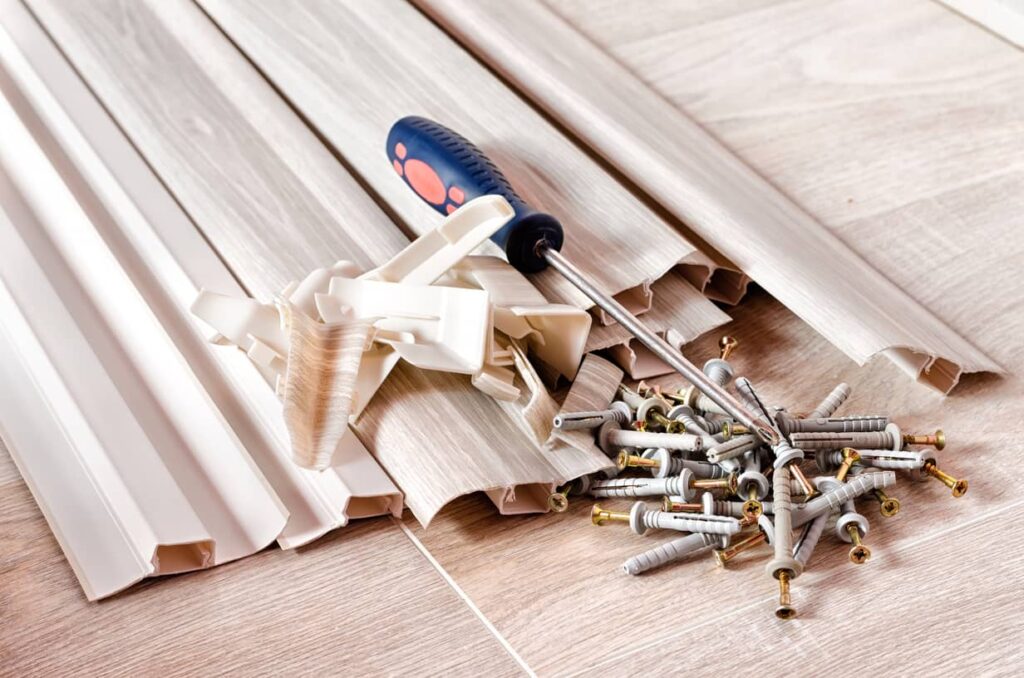
Selecting the right nail size for a project can be challenging. If you plan to install baseboards, you might get confused about what type of nail size for baseboards.
Whether you’re a professional, an experienced DIYer, or someone tackling your first home improvement task, the size of the nails you choose plays a big role in the final result.
Using the correct nails will give you a strong, lasting finish while choosing the wrong ones can lead to mistakes and extra work.
Why Nail Size Matters for Baseboards
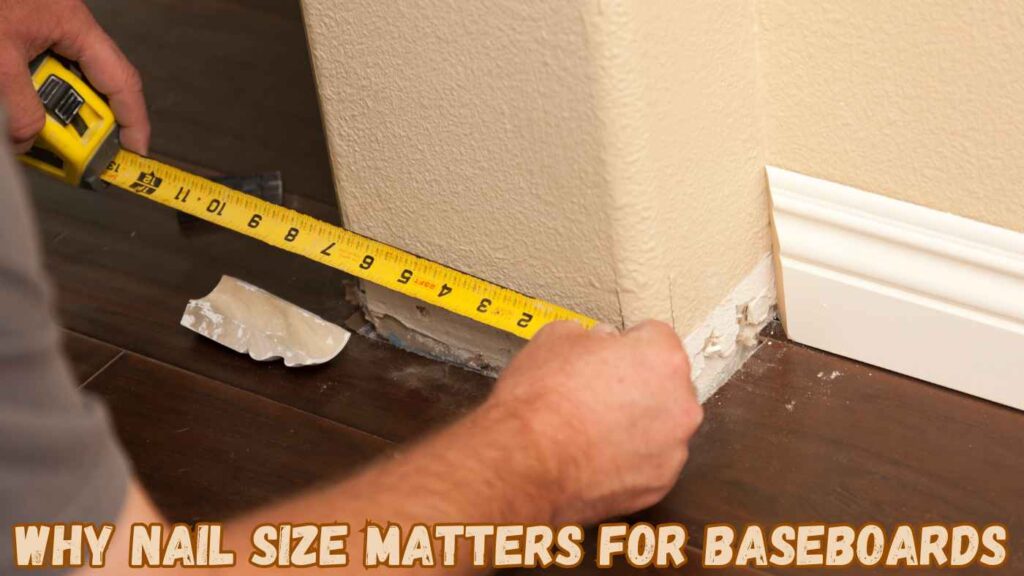
- The size of the nails is crucial for ensuring a secure and clean installation.
- Incorrect nail size can cause issues like wood splitting, loose baseboards, or nail visibility.
- The durability and stability of baseboards depend on selecting the right nail size.
- Baseboards are both functional and decorative, so proper installation is essential.
- Using the wrong nail size can lead to problems like nail pops or warped boards.
- The wrong nail size will create unnecessary hassles.
Nail Size for Baseboards Based on the Baseboard Sizes
Choosing the right nail size for your baseboards is key to making sure they stay secure and look great. Using the correct nails will help avoid damaging the baseboards while ensuring they are firmly attached.
Here’s a simple guide to help you pick the right nail size based on your baseboard width:
Nail Size for 1/2 Baseboard
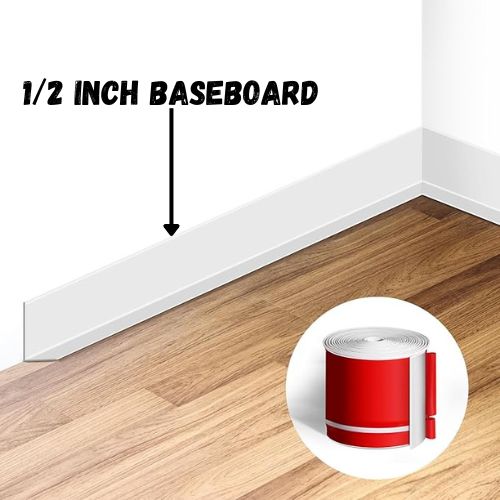
- When working with very thin baseboards like 1/2 inch thick, then 1 inch finishing nails would be the best choice.
- These nails are short enough to avoid damaging the baseboard but long enough to secure it tightly to the wall.
- They work well with softwoods and other thinner materials to ensure a smooth installation without splitting.
- Using this nail size will protect the delicate structure of a 1/2 inch thick baseboard while ensuring a strong hold.
For Baseboards Up to 3 Inches Wide
- If you’re working with smaller baseboards then 1 1/4-inch finishing nails are a great choice.
- They’re the perfect length to hold the baseboard in place without causing any split.
- These nails work well with thinner baseboards or softer woods which can be more delicate.
For Baseboards Between 3 & 5 Inches Wide
- For medium sized baseboards 1 1/2 inch finishing nails are the best option for you.
- These nails are a little longer than the 1 1/4 inch nails, providing extra holding power for wider baseboards.
- They are suitable for various wood types, from softwoods to hardwoods, and help keep the baseboard securely attached over time.
For Baseboards 5 Inches or Wider
- For larger baseboards, especially denser materials like hardwood, 2 inch finishing nails are your best option.
- These nails are the longest you will need for baseboard installation, allowing them to penetrate deep enough into the wall studs for a strong hold.
- The 2 inch nails provide maximum stability and help keep heavy baseboards in place without any risk of loosening.
Recommended Nail Gauge for Baseboards
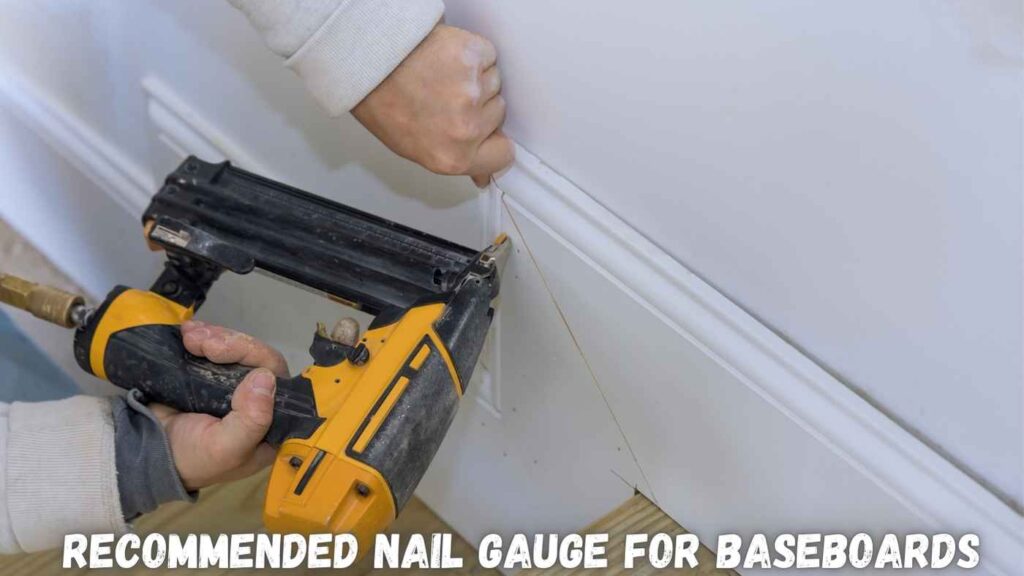
Choosing the right nail size is important for securing your baseboards properly. The nail size you pick depends on the thickness of the baseboard and the type of attaching wall.
Here are the most commonly recommended sizes:
15 Gauge nails for baseboard
These are perfect for thick and heavy baseboards or when you’re attaching to drywall or plaster. They provide a strong hold to keep the baseboards securely in place.
16 Gauge Nails for baseboards
A great option for standard baseboards. While slightly thinner than 15 gauge nails, they still offer strong support and work well with many materials.
18 Gauge Nails for Baseboards
These are best for thinner and lighter baseboards. They’re ideal for materials like MDF or softwoods, where splitting might be a concern.
As a result, using the right nail gauge ensures a strong hold and prevents damaging the baseboard. For heavier baseboards, go for thicker nails like 15 or 16 gauge.
Choosing the Right Nailer for Baseboards
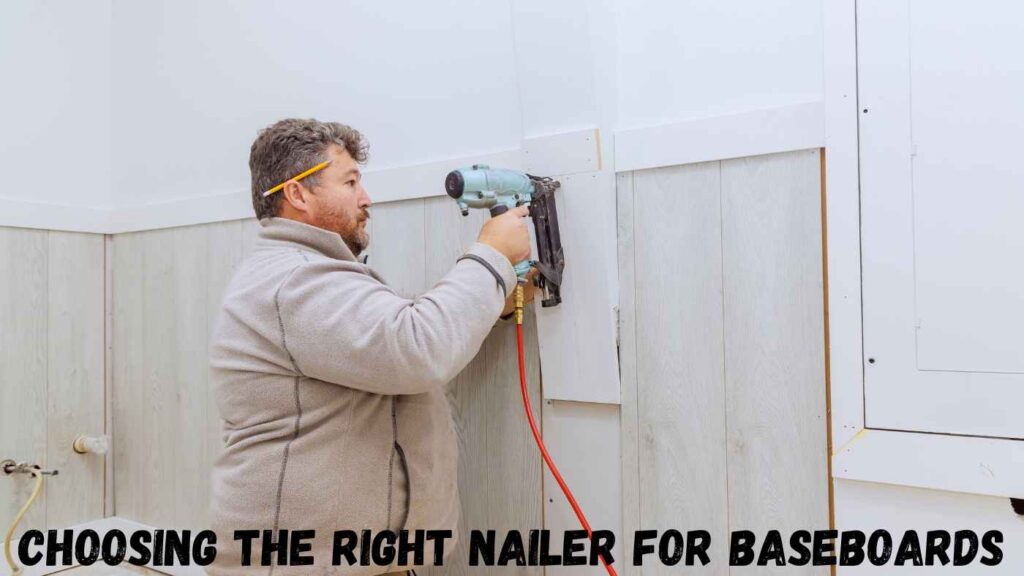
Picking the right nailer for installing baseboards is crucial for a neat and professional finish. It helps secure the baseboards properly, simplifies the process, and ensures your project lasts longer.
With various nailers available, knowing their features will help you choose the best one for the job.
Here’s a quick guide to help you decide:
Finish Nailer for Baseboard
A finish nailer is a popular tool for baseboard installation. It uses 15 gauge or 16 gauge nails, which are thicker than brad or pin nailers.
Why It’s a Good Choice for Baseboards
- Strong Hold: The thicker nails provide better holding power. It keeps the baseboards in place for a long time.
- Great for Larger Baseboards: The nails can go deeper into the studs to make them perfect for bigger or denser baseboards.
- Less Splitting: Thicker nails are less likely to split the wood while securing the baseboard.
Best Situations to Use
- For medium to large baseboards.
- In areas where a stronger hold is needed, like high traffic spaces.
Brad Nailer for Baseboards
An 18 gauge brad nailer uses 18 gauge nails, which are thinner than the nails used in finish nailers. This makes it a better option for baseboard installation.
Why It’s a Good Choice for Baseboards
- Perfect for Lighter Baseboards: It works well for thinner or smaller baseboards in the case of softer materials.
- Less Visible Holes: The tiny nails leave small holes. They are easy to fill and less noticeable.
- Works Well with Adhesive: You can use adhesive along with brad nails for extra support and a stronger hold.
Best Situations to Use
For trim work that requires more precision and less noticeable fasteners. When working with lightweight or decorative baseboards. For lighter or decorative trim use 18 gauge nails are a good choice.
Factors to Consider When Choosing the Nail Size
When it comes to choosing the right nail size, it’s not just about picking a random length. Several important factors must be considered to make sure the baseboard is installed properly and securely.
Here are the main factors that should guide your choice of nail size:
Thickness of the Baseboard
The thickness of your baseboard plays a major role in determining the nail size. Thicker baseboards need longer nails to ensure a secure hold.
For baseboards that are 3 inches or less in thickness, use shorter nails like 1 1/4 inch or 1 1/2 inch. But for thicker baseboards, which are 2 inches or more use longer nails that are 2 to 2.5 inches.
These longer nails go deep enough into the wall to hold the baseboard in place without causing damage. The longer nails help ensure that your baseboard stays firmly attached for a strong, lasting result.
Wall Type
The type of wall you’re working with affects the nail size you’ll need. Nails need to go through the drywall and into the studs behind it to hold the baseboard securely.
For drywall, nails should be long enough to penetrate at least 1 inch into the studs. If your wall is made of drywall, nails between 1 1/4 inches and 1 1/2 inches should work fine.
However, if you have concrete or brick walls, nails alone won’t hold well. In this case, you will need special anchors or concrete nails to secure the baseboard.
These anchors help the nails stay in place, even without wooden studs, preventing the baseboard from loosening over time.
Material of the Baseboard
The material of your baseboard also influences the nail size. Hardwood baseboards, like oak or maple, are dense and may split if you use nails that are too thin.
For hardwood baseboards, use thicker nails such as 15 gauge or 16 gauge to provide better holding power and reduce the risk of splitting.
For softer materials like MDF or pine, thinner nails, like 18 gauge brads, work well. These thinner nails are gentler on the material, ensuring the baseboard stays in place without causing any damage.
Type of Finish You Want
The size of the nails also affects the final look of your baseboard. Larger nails, such as 2 inch finish nails, can leave bigger holes that may need more filling, especially if the baseboard is a visible part of the room.
If you want a smoother finish with fewer visible nail marks, smaller nails, like 1 1/4-inch or 1 1/2 inch, are a better choice. These nails leave smaller holes, which are easier to fill and less noticeable once the job is done.
Project Types
Lastly, think about the specifics of your project when choosing the right nail size. If you’re working in a high-humidity area, you may need nails made from resist corrosion materials, like galvanized or stainless steel.
If the baseboard gets exposed to high foot traffic or rough conditions, try to use thicker or longer nails for durability. Always keep the needs of your space in mind to make sure you’re using the right nails for the job.
How to Nail Baseboards Without a Nail Gun
If you don’t have access to a nail gun, you can still install baseboards using a hammer and nails.
Cut the baseboard to a length
Measure the length of the wall and cut the baseboard to fit using a saw. Make sure to leave a small gap between the baseboard and the floor to allow for expansion.
Apply adhesive
Apply a bead of construction adhesive to the back of the baseboard, making sure to spread it evenly along the length of the board.
Install the baseboard
Hold the baseboard in place against the wall, making sure it is level and straight. Start at one end and nail the baseboard to the wall, driving the nails every 12 to 16 inches.
Fill nail holes
Fill any nail holes with wood filler and let it dry according to the manufacturer’s instructions. Sand the filled nail holes smooth and then prime and paint the baseboard to match the wall.
Repeat for each section
Repeat the process for each section of the baseboard, making sure to stagger the seams between sections to create a seamless look.
While a nail gun makes baseboard installation faster and easier, it is possible to install baseboards using a hammer and nails. Just be prepared for a bit of manual labor, and take your time to ensure a professional and long-lasting finish.
Unique & Additional Tips for Baseboard Installation
Use Adhesive Alongside Nails
You can apply a good quality construction adhesive to the back of the baseboard before nailing. This creates a stronger bond on uneven walls or in areas with frequent movement.
Use a Nail Set Tool
After driving the nails, use a nail set tool to push them slightly below the surface. This makes it easy to fill the holes with wood filler for a smooth and polished look.
Locate Wall Studs
Try to nail into wall studs whenever possible. This helps keep the baseboards securely in place and prevents them from pulling away over time.
Manage Inside & Outside Corners
For inside corners, use coping joints to get a professional fit. For outside corners, make accurate miter cuts and reinforce them with both adhesive and nails to avoid gaps.
Nail at an Angle
Drive nails at a slight downward angle. This improves the holding power by anchoring the baseboard more securely to the wall.
Step-by-Step Guide to Installing Baseboards
Installing baseboards is nothing so overwhelming. You can easily install baseboards by breaking the process into simple steps. By following these steps you will be able to install baseboards with confidence.
Here is the guide to make it easier:
Get Your Workspace Ready
Start by clearing the area where you’ll be working. Remove any old baseboards carefully with a pry bar or utility knife to avoid damaging the wall.
Measure the length of each wall and cut the new baseboards to size using a miter saw. For corners, cut the ends at a 45 degree angle to fit them together.
Prepare Your Nail Gun
Select the right nail size based on the size of your baseboards. If your baseboards are up to 3 inches wide, 1 1/4 inch nails will work well.
For larger boards use 1 1/2 inch or 2 inch nails. Load the nails into your nail gun and adjust the depth settings to avoid nail overdriving or underdriving.
Secure the Baseboards
Place the baseboard against the wall ensuring it’s flush and level. Nail into the wall studs spacing the nails 12 to 16 inches apart for a solid hold.
Use two nails per stud—one near the top and one near the bottom. This ensures the baseboard is firmly attached.
Cover the Nail Holes
After securing the baseboards, fill the nail holes with wood filler or caulk. Use a putty knife to spread the filler evenly and make sure all holes are fully covered. Once it dries, gently sand the area to create a smooth and clean surface.
Add the Finishing Touches
To complete the project apply primer and then paint or stain to match your design. Let each coat dry before adding the next.
Check for gaps and touch up any spots as needed. Finally, clean the area to remove any dust or debris.
Common Mistakes to Avoid When Nailing Baseboards
Using Nails That Are Too Short
Short nails fail to securely hold the baseboards. It causes it to loosen or detach over time. To prevent this use appropriately sized nails.
For baseboards up to 3 inches wide, use 1 1/4 inch nails. In the case of larger boards use 1 1/2 inch or 2 inch nails for a stronger hold.
Over Nailing
Adding too many nails can damage the baseboard. Unnecessary holes will be seen and it will potentially weaken the material.
Proper nail spacing is usually 12 to 16 inches apart along the studs. This spacing is sufficient for secure installation properly. Avoid the temptation to overdo it.
Skipping Pilot Holes
For hardwood baseboards skipping pilot holes can cause the wood to split, especially near the edges.
To avoid this problem, pre drill small pilot holes before nailing. This simple step prevents cracking and ensures a cleaner finish.
Improper Nail Depth
Driving nails too shallow leaves them protruding, creating an uneven surface, while overdriving can dent the baseboard.
Adjust your nail gun’s depth setting so the nails sit slightly below the surface without causing damage.
Conclusion
Selecting the right nail size for baseboards is a significant step to achieving a professional finish.
By understanding the right nail sizes, using the correct tools, and following proper techniques, you can make sure your baseboards are strong, durable, and look great.
Whether you’re an experienced professional or trying a DIY project for the first time, this guide has everything you need to get the job done—literally!
FAQs
1. Can You Nail Baseboards with a Hammer?
Ans: Yes, you can use a hammer to attach baseboards. But it takes more time and can be less accurate compared to a nail gun.
With a hammer, you have to deliver more effort to drive the nails. For a faster and cleaner result a nail gun is a better choice.
2. Is It Better to Nail Baseboards or Glue Them?
Ans: Nailing baseboards are generally the best option for a strong and long lasting hold. While glue can provide extra support, it’s not as reliable on its own.
For the best outcome, use both methods—nail the baseboard for stability and add glue for extra strength.
3. What Are Baseboard Nails Called?
Ans: Baseboard nails are usually called finish nails or brad nails. Finish nails are generally called 15 or 16 gauge. In contrast, brad nails are also called 18 gauge.
4. Can I use screws for baseboards?
Ans: Yes, you can use screws for baseboards, especially in areas that need extra support. Furthermore, you can use screws when the wall material is hard to nail. Screws offer a strong and secure hold.
But you may need to pre drill holes to prevent splitting the baseboard. For a cleaner look, you can countersink the screws and cover them with filler.
However, nails are usually quicker to use and give a more seamless finish.